Alternating Skeins: The Necessary Evil of Hand-Dyed Yarn

A common issue with hand-dyed yarns is that it’s sometimes very difficult to get two matching skeins, even if they came from the same dye pot. The first time I encountered this was when I was shopping at the yarn store in which I worked. We had some lovely hand-dyed sock yarn from a fairly well known company in stock, and I wanted to order a few more skeins of the same color for a larger project. When we got the shipment of new yarn, I was surprised to see a very noticeable difference in the two lots; the first lot I had ordered from was a darker red with orange and green while the second lot was a slightly lighter red with more orange and yellow and green. Both were beautiful, and I could easily understand how they are considered the same colorway. I also noticed that I saw minor differences in shade throughout the dye lot; some skeins were a little darker while others had the fall colors more evenly distributed. For that project, I chose skeins that were the most similar to each other, and was able to create a beautiful scarf with multiple skeins of hand-dyed yarn.

I now have the pleasure of being on the other end of the market, and I see exactly why and how hand-dyed yarn can end up with a bit of variety in each pot. There are an incredible amount of different factors that go into how a skein looks by the end of the dyeing process. The yarn takes dye differently depending on where it is sitting in the pot, how close it is to the heat source, the different chemicals that are added, at what time the different chemicals are added, how much water the yarn is floating around in, the pH of the water, other chemicals in the city water we use, and the phase of the moon. (Obviously the moon phase has little to do with dyes, but the underlying point is that there will always be an element of randomness to it, even with the best laid plans.) So what can we do about this issue while making our projects? We can alternate skeins!

I’m not going to beat around the bush with this issue: alternating skeins is a pain. It takes forethought, extra winding of yarn, and it means that you have to carry more yarn with you if you’re traveling with your project (and don’t forget the occasional untangling). On the other hand, if you don’t alternate skeins when it’s needed, it can mean that you will not be happy with your finished project that you spent hours carefully working on. Why risk disappointment?

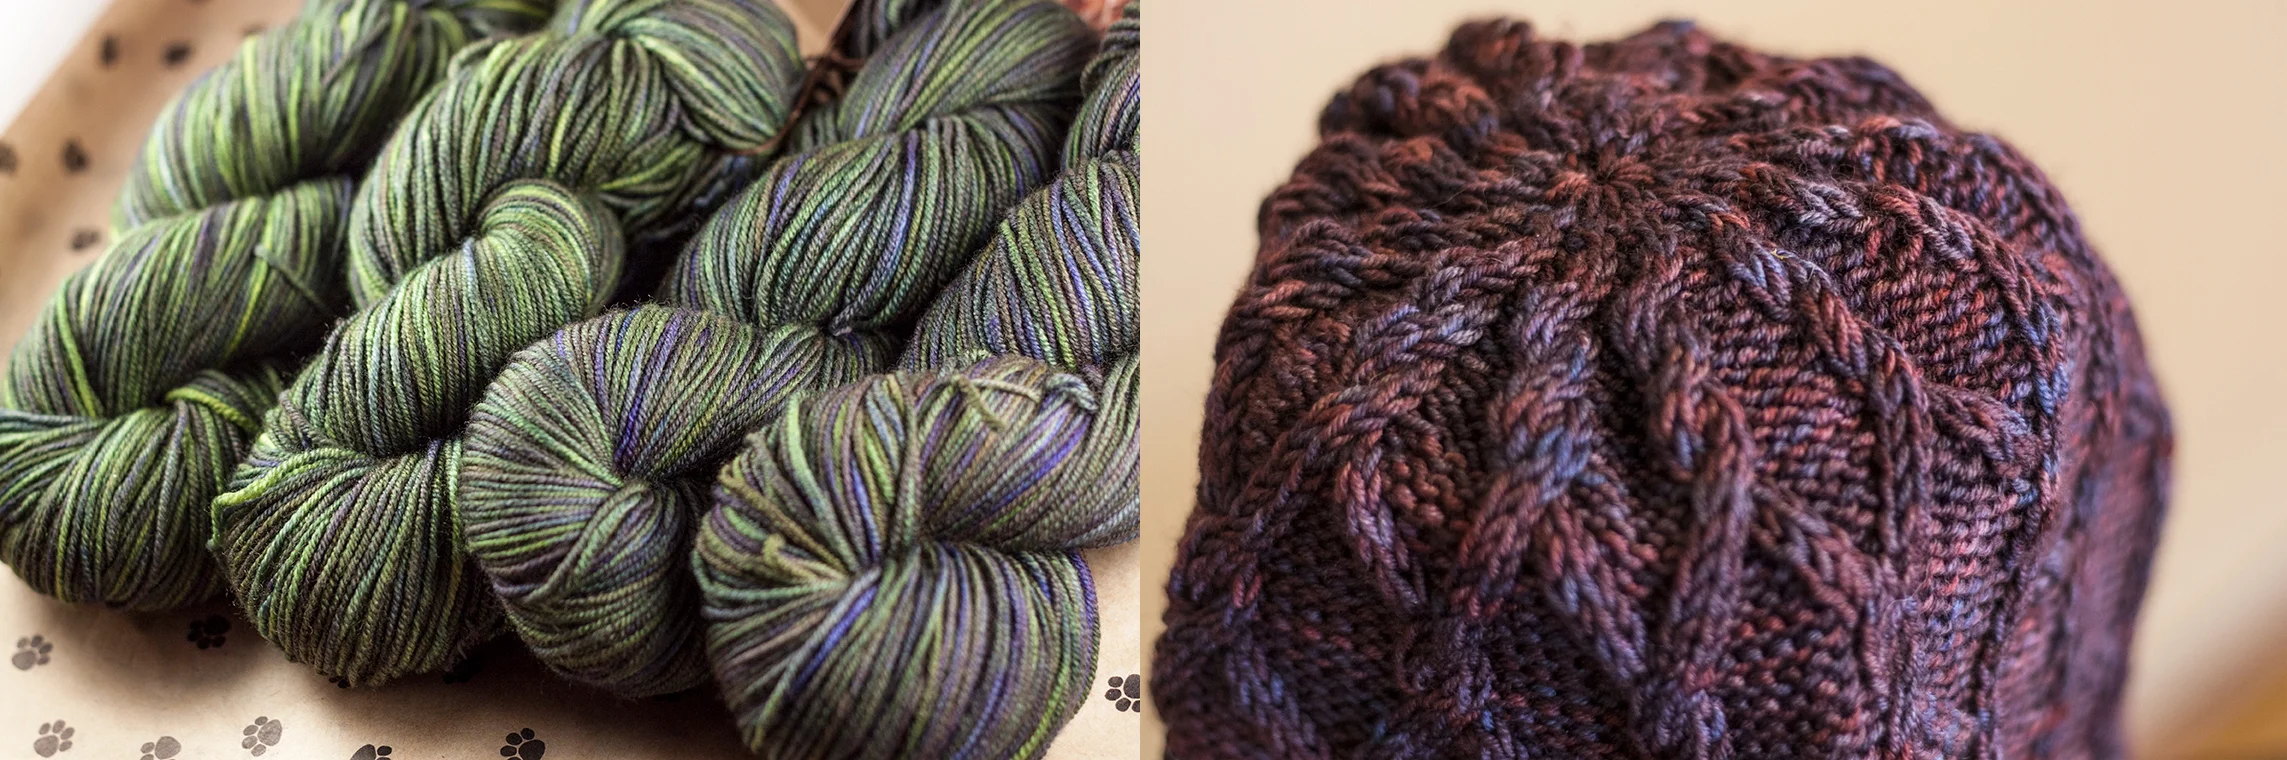
I’ve recently been preparing to make a sweater, which requires around 6 skeins of Norwegian Elkhound yarn. Even when they were hanging to dry, it was noticeable that there were variations between the different skeins.

Skeins of Norwegian Elkhound In Running Dog Nebula drying after being dyed.

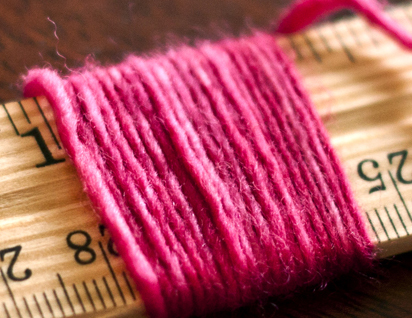
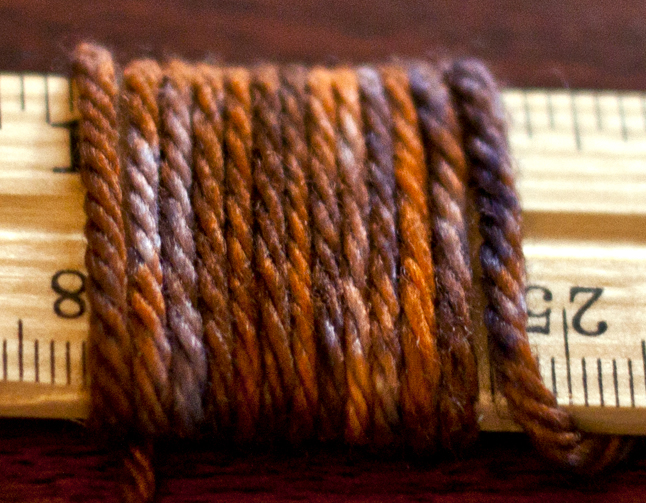
After the skeins are wound, it’s easier to tell which skeins have the most contrast to each other; Some are more pink while some have a little bit more blue in them.

When the skeins are wound into center-pull balls, it's easy to compare how the colors will be distributed.  You can see the bottom right skein is slightly more blue than the rest.

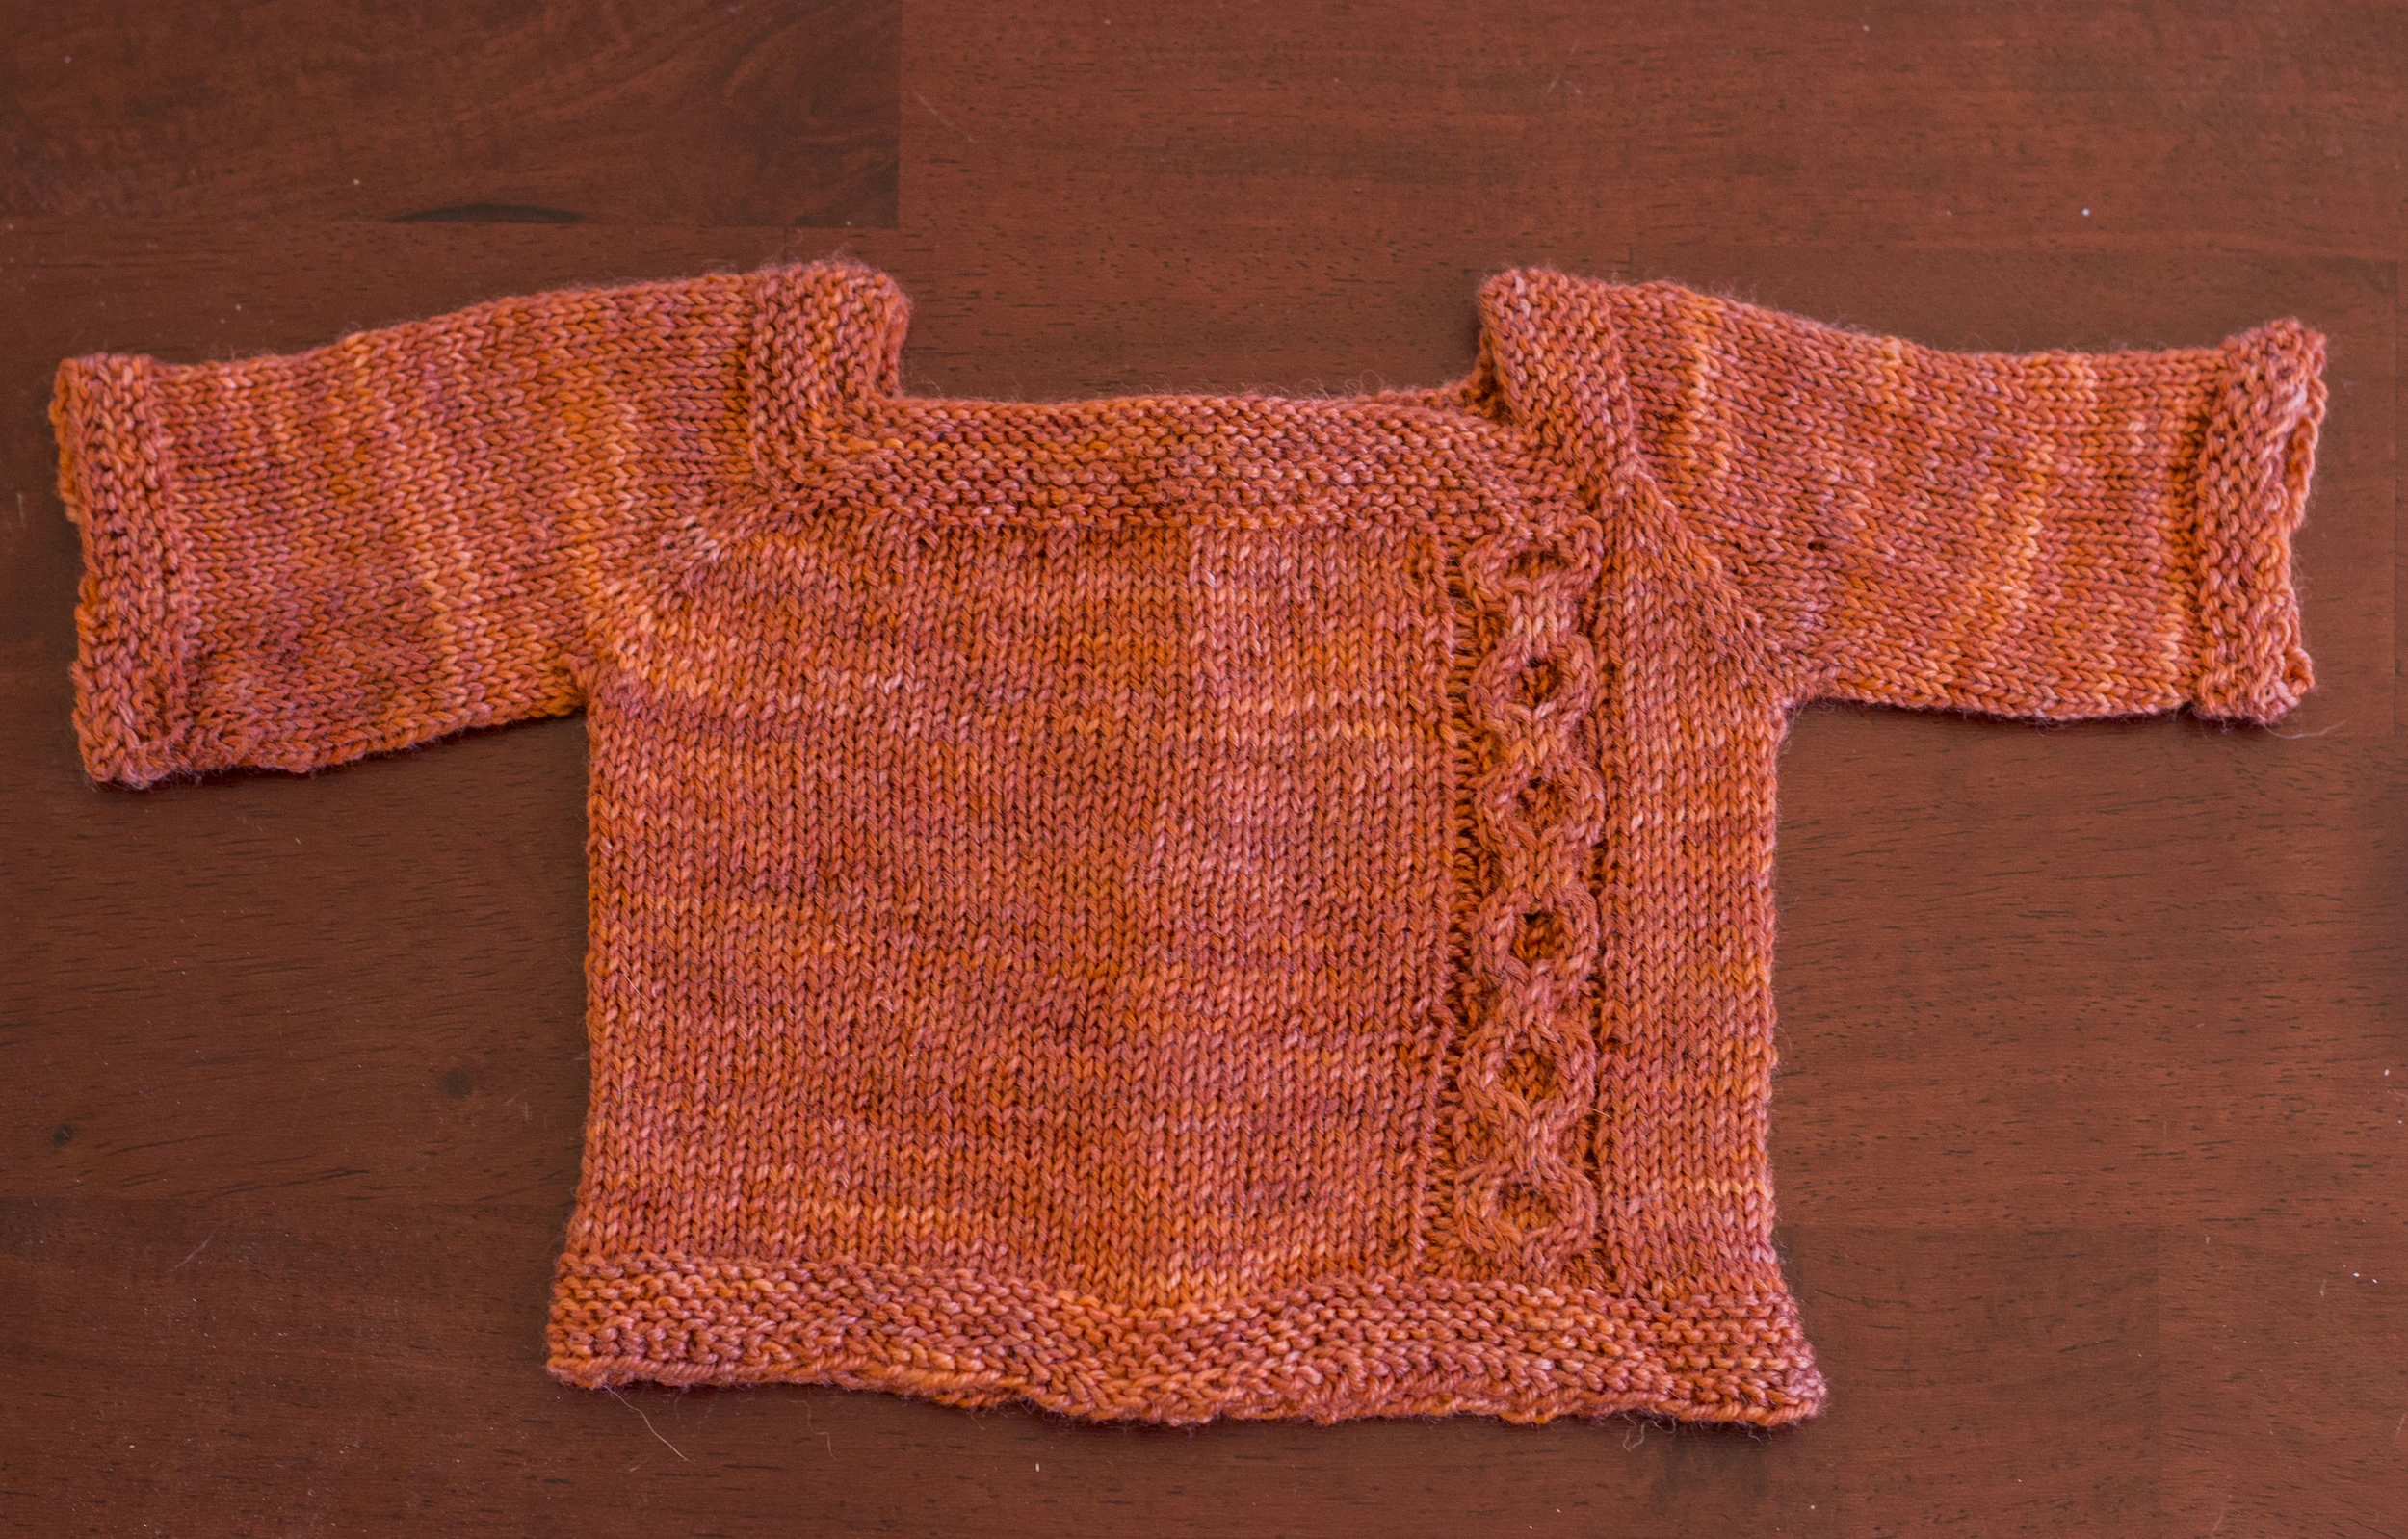
If we were to knit the two most contrasting skeins next to each other in a project, we would be disappointed in the result because it’s very obvious about where the first skein ends and the second skein begins.  By alternating the skeins, even with the stark difference in the first swatch, it’s difficult to tell that the skeins were all that different to begin.

The obvious half-way line shows where one skein ends and another begins.

It's difficult to tell that there are two different skeins being used because the colors are distributed more evenly.

How do I alternate skeins?

To alternate skeins, you will need to have two skeins of yarn from which you are ready to knit or crochet. If you’re making a flat project, work two rows, one row for the front and one row for the back with the first skein. If you’re making on a project in the round, work only one row instead.

Once you have worked back to your starting point, drop the yarn from the first skein and pick up the yarn from the second skein, leaving a six inch tail to weave in at a later time.

Work one/two rows until you return to the starting point, and drop the yarn from the second skein.  Pick up the first skein and repeat switching back and forth until you are done with your project.

Crude drawing of proposed alternating skeins method

If you’re working on a larger project, like the sweater I’m planning on making, you can start off working more than just one or two rows from the first skein so that the changes between the skeins are more gradual. I plan on knitting with about half the first ball before I start alternating with the second skein so that I won't suddenly have to switch from one set of two skeins to another set of two skeins mid project.

When is alternating skeins necessary?

Alternating skeins isn’t needed all the time with multiple skein projects. If you have two skeins of yarn that appear to match identically, it may not be worth the effort to alternate them. However, with hand-dyed yarns, alternating skeins is always the safest course of action to make sure that you won’t have to redo your project, or worse, hate your project when it’s finished.  

Have you ever had a project where you've been able to see the difference between ending and starting points of the skeins?

Posted on December 11, 2013 and filed under Yarn Theory.

Weight For It: Yarn Weights Explained

A number of people have recently inquired about yarn weights and associated meanings, so I decided it was time to dive deep into the topic and explain some things.  There are a number of things that are added on to yarn tags that don’t always provide useful information, such as icons from the Standard Yarn Weight System, gauge ranges, and recommended needle sizes.  I believe they are arbitrary pieces of information, and I will explain why below.

Standard Yarn Weight System

The Craft Yarn Council of America defined the Standard Yarn Weight System with 7 different size designations.  Each size (or weight) is assigned a name and a number:

0 Lace
1 Superfine
2 Fine
3 Light
4 Medium
5 Bulky
6 Super Bulky

Although most yarns from big box stores (Hobby Lobby or Michaels) have this notation on them, the fact that they have “standard” in their name is a bit of a misnomer.  Sadly, there is no agreed standard with anything regarding yarn, and the only truly useful piece of information for yarn weights is called wraps per inch, or WPI.  To measure WPI, you can wrap the yarn around a ruler (or similar measuring device) and depending on how many times it can comfortably wrap around the ruler in the space of an inch determines which category of weight it falls into.  In the spirit of loose standards, the restrictions of the categories can be subjective depending on the source.
 

Recommended Needle Size

Another thing that is commonly listed on yarn is the recommended needle size.  I’ve been asked by a beginning knitter a few times this week if she should buy a certain needle to go with the yarn she purchased.  I advised her to buy needles for patterns, not for what is recommended on the yarn.  Why is this?  Because a lovely ball of worsted weight yarn could recommend a size 8 needle, yet the pattern you’ve chosen asks you to use a size 6 needle.  I’m certainly not against collecting knitting needles, but it’s nice to be frugal when possible.  On top of the recommended needle size for the pattern, there is the issue of personal gauge with the yarn to keep in mind, which is a topic that will be discussed in a future blog post.
 

Yarn Weight & Ply Relationship

A third piece of information that can be often listed that can be a little confusing is the listing of a weight and then a number of plies.  An example from Ravelry’s search option shows exactly this.

Screen Shot 2013-12-01 at 9.10.32 PM.png

This references back to when factories were only able to spin one thickness of singles, but it could be plied together as many times as needed to get the appropriate thickness.  
 

"3/2"?!?

A final piece of information that is more often seen on cones of yarn is a designation similar to the format “3/2” in regards to weight.  These are usually on yarns that are meant for weaving, and in the US 3/2 would mean size then plies, and to further confuse things, it’s the opposite in Great Britain.
 

Now, we will go through all of the different weights from thinnest to thickest that Fiber Hound carries, with some brief mentions of others.  

Basenji is 22 WPI

Lace
WPI: 18+
Ply: 1-2
Other Names: cobweb, crochet thread

Lace is the category in which very fine yarns are stuck in, which means there’s a fair amount of wiggle room for what could be considered a lace yarn.  Cobweb is the term used for extremely fine yarns that, much like their namesake, could be as thin as a spider’s silk.  The word “lace” is heavily derived from terms meaning net or snare, which brings to my mind lacey shawls.   Fiber Hound’s Basenji is on the relatively heavier side of lace, achieving a 22 WPI, while Saluki is a finer 24 WPI.

Italian Greyhound is 20 WPI

Italian Greyhound is 20 WPI

Sock/Fingering
WPI: 14-22
Ply: 3-4
Other Names: baby

Many people use the terms “sock” yarn and “fingering” yarn interchangeably, but there can be a minor difference.  In regards to thickness, fingering weight yarns are a little thinner than sock yarns.  As well, when the term “sock” is associated with a yarn, it could be assumed that the yarn would be a good choice for socks; this is not always the case, and can be misleading.  The origin of the term “fingering” is derived from fingram, from the French fin grain, which means “fine grain”.  In relation to yarn, this could imply that it is a more fine weight of a yarn.  Fiber Hound's Italian Greyhound is the thinnest of the three fingering weight yarns at 20 WPI, Dachshund is 18 WPI, and the luscious Borzoi is 16 WPI.

Bluetick Coonhound is 14 WPI

Bluetick Coonhound is 14 WPI

Sport
WPI: 12-18
Ply: 5
Other Names: baby

The name of this weight confused me when I first saw it as I couldn’t understand what sports had anything to do with knitting.  While the name is not actually related to athletics, the yarn weight is preferred for “sportwear” and associated clothing. Fiber Hound's Bluetick Coonhound is 14 WPI.

Afghan Hound is 14 WPI

Afghan Hound is 14 WPI

DK
WPI: 11-14
Ply: 8
Other Names: light worsted

DK stands for double knitting (or double knit), which is a reference to having two thinner yarns being plied together to make a thicker yarn.  There appears to be a few different anecdotes floating around in regards to the origins.  The first story is the yarn weight’s use in WWII, where factories in Great Britain frugally created size between sport and worsted that could “double” for either in the final product.  The second origin cites the weight being doubled up from fingering weight.  Fiber Hound's Afghan Hound is 14 WPI.

Norwegian Elkhound is 13 WPI

Norwegian Elkhound is 13 WPI

Worsted
WPI: 9-11
Ply: 10
Other Names: afghan, aran

The term worsted finds its origins from “worstead”, the name of a village in Norfolk in which yarn and cloth were crafted.  The term often causes confusion because of the spinning term worsted (in contrast to woolen).  Worsted in regards to spinning means that the yarn is smoothly spun with the fibers prepared in a method that makes them parallel to each other. Woolen can mean anything that does not fit into the worsted category, and the resulting yarns are often much more lofty and fluffy.  Neither of these things matters when referencing yarn weight, but they’re important to know for context.  Aron  (pronounced Aaron) yarns are often considered being thicker than worsted weight yarns.  Fiber Hound's Norwegian Elkhound is 13 WPI.
 

You may have noticed that a couple of the yarns are also known as “baby”.  I have not yet discovered the origins of this, but I suspect the designation is an attempt to point customers into the idea of “this is good for baby garments”.  

I find the differences in yarn weights to be highly arbitrary and subjective, and if I had a say in anything, I would remove all the names of the yarns and go entirely by WPI, but I do not see that happening in the near future.  Each yarn company and mill has their own ideas of which yarns fit into what category which can cause more confusion for our customers.

If you had to choose one option to go by to sort the weights of yarn, what would you choose? Do you have a better solution?


Sources:
http://www.craftyarncouncil.com/weight.html
http://www.knittersreview.com/forum/topic.asp?TOPIC_ID=88945
http://knitting.about.com/od/yarn/f/Does-Ply-Have-Anything-To-Do-With-Yarn-Weight.htm
http://en.wikipedia.org/wiki/Yarn_weight
http://www.ravelry.com/help/yarn/weights
http://www.etymonline.com/index.php?term=fingering&allowed_in_frame=0
http://en.wikipedia.org/wiki/Worsted
http://www.kathys-kreations.com/tips/page95.html
http://www.etymonline.com/index.php?term=lace
http://kws.atlantia.sca.org/Woolen_vs_Worsted_Explained.pdf

Black Friday Sale

blackfridayad-copy.jpg

Have you been holding back on purchasing some yarn until the right moment?  Are you looking for some yarn for the perfect holiday sweater?  What about a gift for someone who knits, crochets, or weaves?  The time to act is now!  Enjoy 15% off of your entire purchase by using the code BLACKFRIDAY at our store.  Click here to visit our store now!  This sale starts TODAY and lasts until Monday, December 2nd!  This sale includes custom orders, so if you don't see what you'd like to buy, contact us and ask!

Posted on November 27, 2013 .

Afghan Hound & Sea Beanie

I have had Sea Beanie in my queue for as long as I can remember having a queue, and I was pleased to finally create this hat for the Afghan Hound KAL that is going on in Fiber Hound’s Ravelry Group.

Sea Beanie, by Elena Nodel, is a hat featuring a stunning cable design on the front, with thick ribbing in the back. The pattern is a part of a set of nine garments inspired by the sea and can be made with DK or worsted weight yarns. Adding onto that versatility, the pattern comes in 4 sizes, Toddler, Child, Adult, and Large Adult. I made mine out of Cerberus in the Adult size as I knew that color would show off the cables wonderfully.

The hat begins working in a 1:1 ribbing, then goes right into the cabled pattern. The pattern has graciously included a charted version and a written version of the pattern and even has a photographic how-to instruction for one of the more complicated increases. After the cable pattern is completed, a standard decrease pattern finishes off the hat.

The versatility and enjoyment I’ve received from this hat encourages me to make many more of these for the future. Plus, out of the Afghan Hound, you can easily make more than one in the smaller sizes, which is a great option for gifts!


Fiber Hound has started a newsletter so you can stay up to date with what’s going on! You can subscribe by clicking here.

Posted on November 20, 2013 and filed under Pattern Review.

The Puppy Button Saga

A year and a half ago while I was still working at the local yarn shop, we got in an order of buttons that included the most adorable puppy-shaped buttons I had ever seen.  I was determined to do something with them, so I found the pattern called Gig Gloves, by Grace Akhrem, which had 7 buttons on each mitt.  The pattern was perfect - not too complicated, and it was clearly meant to show off anyone’s favorite buttons.  While the appropriate amount of buttons had been ordered for my pattern in queue, the shop I worked at closed before they were able to come in and be in my possession.  This is where I thought the story of the puppy buttons ended.

That is, until over a year later, I found my own yarns being sold at a local store where I happened to be at an event in which I had a fair amount of time to stand around and enjoy everything around me.  And then I saw them: the puppy buttons!  I immediately ordered 14 of them in the two different colors they had, and dyed up some Afghan Hound  in Throw Me A Bone to match.  

When the buttons were finally in my possession, I decided to save the little mitts as a project to work on during my wedding day and on my honeymoon.  (And yes, I knit during my own wedding.)  

The pattern is delightfully simple and quick, yet attractive.  The basic form is a square knit in stockinette, with the edges being garter stitch.  The only difference between the two hands is which side the buttons holes are made, and the thumb holes are made by easy m1s in whichever method you prefer.   The strap at the bottom is purely decorative (because then you get to have an extra button!), and adds a nice little aesthetic touch.  It’s knit separately and then attached after blocking.

I kept the buttons safe at the bottom of my project bag throughout my travels in Vancouver, and when I was finally ready to attach them, I realized the tapestry needle I had didn’t fit through their holes.  I planned to resolve this issue by visiting a yarn store in the Downtown area, and while I purchased an appropriately-sized crochet hook to take care of the job, I never got around to attaching them for the rest of the trip.

While packing, I took a mental inventory of everything we brought, and one thing appeared to be missing: the puppy buttons.  We searched EVERYWHERE, but they were nowhere to be found.  The Tuesday after we returned to South Bend, I dreadfully called up the store to see how many (if any) buttons they had left.  To my luck, they  had enough for me to properly button up one mitt, and have ordered more for the second!  After having the buttons in my possession for the second time, I attached them as quickly as possible to avoid any other extensions to this story.

I absolutely adore these gloves, and I look forward to getting the rest of the buttons so I can wear them out in the now chilly weather.  The Afghan Hound is absolutely perfect for the warmth of the Merino and the softness of the silk, especially because I have sensitive skin.

Posted on November 13, 2013 and filed under Pattern Review.